
|
The item/enemy descriptions on this page are strictly meant for role-playing purposes. |
When you first venture into the city, zombies appear infrequently and are easy to kill. As you move deeper into the city, however, progressively tougher zombies will appear, easily identifiable by their color and unique, mutated body types. The health points of all infected stated here is only at the best accuracy from the actual health value.
There are also several factors, like all kinds of movement (note that movement attracts individual infected) and fighting noise, that will increase "Aggro" (Aggression), or more exactly, the number of zombies that will spawn nearby, up to eight at once in 2D version, and about 20-30 in 3D, and their moving speed.
Due to various special mechanics surrounding them, Bosses have been moved to their own page.
Important Notes[]
- Your experience (EXP) gain is multiplied by 150%. while you're Nourished, 120% when you're Fine, only 90% while you're Hungry, and only 60% while you're Starving.
- You can find the player movement values to compare to zombie movement values on the page here.
- Experience per single attack is based on damage dealt, and there is no reward for dealing overkill EXP:
- For example: If you deal 20% of a zombies health, you will immediately gain 20% of that zombie's EXP. If a zombie has 10% HP and the killing blow does 20% damage, you will gain 10% of the zombie's EXP.
- The EXP to HP ratio of a zombie (from now on referred to as EXP Density) stands as a rough indication of how quickly you can earn EXP when level up. If you deal damage to a zombie with a higher EXP Density, regardless of whether or not you can kill it, you will always gain XP more quickly.
- All XP bits gained are then rounded to 2 decimal precisions. This can cause minor rounding issues with EXP gain.
- This also happens in multiplayer, meaning that if a player does the majority of the damage they get a majority of the experience. As with players, the share of EXP the guards receive is proportional to the amount of damage they dealt to a zombie before it was killed.
- Players looking to rack up lots of EXP should keep this in mind when grinding through an Outpost Attack-- relying too much on the guards for support fire (or grinding a horde within their attacking range) can significantly cut down your EXP gain.
Stages of Zombie Behavior[]
The zombie behavior stages are as follows:
Calm -> Disturbed -> Enraged
- Calm state is the state wherein the zombies are walking very slowly and not paying any attention to trespassing survivors. They proceed at their slowest speed and commonly walk in a circle.
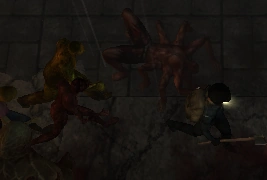
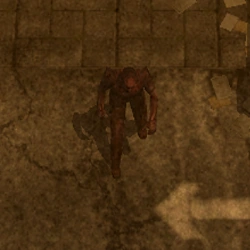
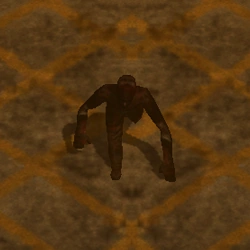
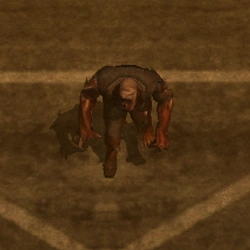
A few zombies on an Enraged state chasing a player.
- Disturbed state causes the zombie to slowly walk towards the player. Speed is slightly higher than Calm, but lower than Enraged.
- Enraged state is the state wherein the zombies are angered and sprints toward the players. They proceed to move on their fastest speed.
- Fleeing state is when a zombie is fleeing from the player temporarily because its path is blocked but will, in a matter of seconds, redirect its attention back to the player. Normally the zombie will run backwards in a diagonal line to try to better its position.
Several events can cause the zombie to advance in the behavior charts:
- A Calm zombie becomes Disturbed if they manage to get a direct line-of-sight on a player.
- Hurting the zombie advances its behavior by 1 stage (It is thus possible to damage a Calm zombie and only makes it Disturbed)
- A firearm "noise" event advances the zombie's behavior by 1 stage. Different firearm types have different chance of doing this, with Pistols/Rifles having the lowest and Shotguns/Explosives having the highest.
- A Siren's scream instantly causes all nearby zombies to become Enraged.
- Entering AFK mode or exiting the block causes zombies targeting you to become Calm, unless they can find another player as target, in which they will keep their current behavior. Exiting AFK mode does not affect zombie behavior.
- All zombies spawned by aggro spikes are instantly Enraged.
NOTE: Certain zombies such as the Spiders, Giant Spiders and Bloats only goes through 3 phases: Calm, enraged, and fleeing. These zombies are instantaneously enraged when they notice the survivor.
Knockback and Stagger[]
Knockback[]
All zombies have a hidden "weight" stat that determines their susceptibility to knockback. Rule of thumb is: "fatter" zombies like Bloats and most bosses have higher weight and thus heavy resistance to knockback, while "thin" zombies like Long Arms have lower weight and thus can be knocked back easily even with pistols/rifles.
Stagger[]
Zombies can also be staggered if it receives a hit (or a combination of hits in case of shotguns/minigun) that deals at least 1/50 of its remaining HP, with effect increasing the lower its HP gets. This causes it to temporarily stop moving and become more susceptible to the effects of knockback, even from weapons that have yet to meet the stagger requirement.
- Normal zombies and mini-bosses will get staggered for a significant amount of time, enough to get greatly pushed back by other players with high-KB weaponry. Most bosses will barely pause when staggered.
- Staggering a zombie does not interrupt its attack; if you are in the attack range of a staggered zombie, you will get still get hit as usual.
- Stagger condition is independent from knockback power; weapons with low knockback power but high DPH (such as bolt action Rifles) are able to stagger heavy target earlier than usual, but will not inflict knockback as well against weaker enemies.
Current Zombie Population[]
This is the second generation of zombies, which were introduced with the change to Unity3D as the primary game engine. Their "ancestors" are the 2D Zombies, which were totally replaced by the new 3D variants. The second generation both surpasses its predecessors both by in quantity and in lethality. The longer time the virus is allowed to remain in the host, the more likely the host will mutate and become more lethal.
The following summaries do not discount melee as an efficient form of combat against the undead. What is trying to be stressed is that long-ranged combat is usually the safest alternative, as the claws, blades, and teeth of the undead are not often able to reach the distance of a bullet. It is generally best to attack zombies in groups or to have a varied arsenal.
Normal Zombies[]
These Normal Zombies form the rank and file of the infected population. While the weakest of Normal Zombies may not be capable of doing anything other than a weak melee swipe that can easily be avoided, later forms of Normal Zombies may have special abilities that may pose credible challenges to the players, such as:
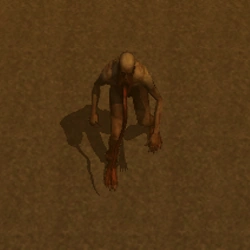
- Long Arms: These enemies are gifted with unusually long arms, allowing them to strike from a further distance than normal.
- Pukers: These enemies are capable of puking acid that reaches much further than Long Arms; this requires them to stand still for a long time however, and will make them vulnerable to being blindsided by melee attacks.
- Dogs: While they may have shorter reach than normal, dogs are infamous for having incredibly high speed and damage; one or two of these can quickly overwhelm an exhausted survivor with just a few bites.
- Exploders: These will explode violently when killed by any firearm, damaging anyone near them. Try to keep your distance, or use a melee weapon to deal with them instead.
Tier 1 - Basic ("Grey") Zombies[]
These are the most basic zombies available in the game, equivalent to the Grey zombie power level in the 2D era. They are most numerous in early-game zones like the Blue and Green zone, and barring very specific circumstances, gradually disappear in higher level zones.
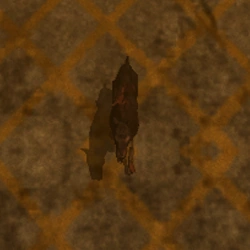
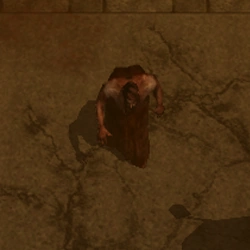
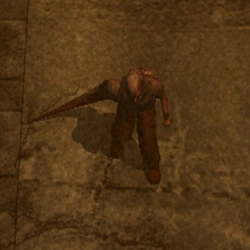
| Dog Zombie | ||||
|---|---|---|---|---|
 |
HP | Damage | ||
| Melee | Vomit | Explosion | ||
| 20 | 10 | - | - | |
| EXP | Speed | |||
| Calm | Disturbed | Enraged | ||
| 15 | 1.1 | 2.2 | 4.5 | |
| Density | Zones | |||
| 0.75 EXP/HP | B / G / Y / O / R / DR | |||
| ||||
|
Notes:
| ||||
|
Tactics/Strategies:
| ||||
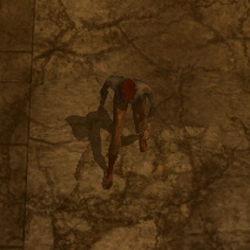
| Female Zombie | ||||
 |
HP | Damage | ||
| Melee | Vomit | Explosion | ||
| 21 | 8 | - | - | |
| EXP | Speed | |||
| Calm | Disturbed | Enraged | ||
| 15 | 0.8 | 2 | 4 | |
| Density | Zones | |||
| 0.714 EXP/HP | B / G / Y / O / R / DR | |||
| ||||
|
Notes:
| ||||
|
Tactics/Strategies:
| ||||
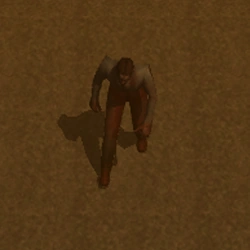
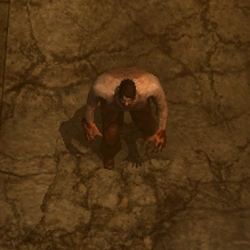
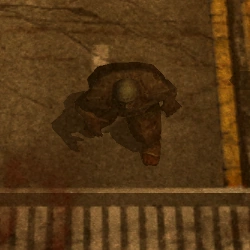
| Male Zombie | ||||
 |
HP | Damage | ||
| Melee | Vomit | Explosion | ||
| 25 | 10 | - | - | |
| EXP | Speed | |||
| Calm | Disturbed | Enraged | ||
| 15 | 0.8 | 1.5 | 3.5 | |
| Density | Zones | |||
| 0.6 EXP/HP | B / G / Y / O / R / DR | |||
| ||||
|
Notes:
| ||||
|
Tactics/Strategies:
| ||||
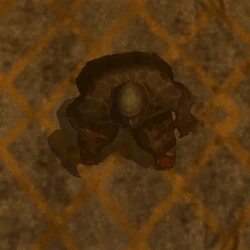
| Fat Female Zombie | ||||
 |
HP | Damage | ||
| Melee | Vomit | Explosion | ||
| 30 | 10 | - | - | |
| EXP | Speed | |||
| Calm | Disturbed | Enraged | ||
| 21 | 0.6 | 1.5 | 2.8 | |
| Density | Zones | |||
| 0.7 EXP/HP | B / G / Y / O / R / DR | |||
| ||||
|
Notes:
| ||||
|
Tactics/Strategies:
| ||||
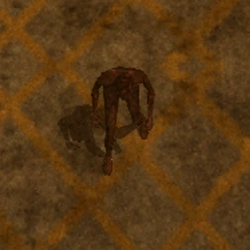
| Fat Male Zombie | ||||
 |
HP | Damage | ||
| Melee | Vomit | Explosion | ||
| 34 | 12 | - | - | |
| EXP | Speed | |||
| Calm | Disturbed | Enraged | ||
| 22.5 | 0.6 | 1.6 | 3 | |
| Density | Zones | |||
| 0.662 EXP/HP | B / G / Y / O / R / DR | |||
These are the strongest of all un-mutated zombies that can be found near the outpost. | ||||
|
Notes:
| ||||
|
Tactics/Strategies:
| ||||
Tier 2 - Burned ("Purple") Zombies[]
These zombies are equivalent to the Purple zombies from the 2D era, being more durable and powerful than the basic Gray Zombies. Almost all of them appears from the Green to the Dark Red zone, with the exception of Blood Hounds which starts appearing from the Yellow zone instead.
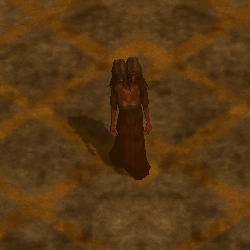
| Burned Female Zombie | ||||
|---|---|---|---|---|
 |
HP | Damage | ||
| Melee | Vomit | Explosion | ||
| 70 | 22 | - | - | |
| EXP | Speed | |||
| Calm | Disturbed | Enraged | ||
| 75 | 1 | 2.5 | 5 | |
| Density | Zones | |||
| 1.071 EXP/HP | G / Y / O / R / DR | |||
| ||||
|
Notes:
| ||||
|
Tactics/Strategies:
| ||||
| Irradiated Female Zombie | ||||
 |
HP | Damage | ||
| Melee | Vomit | Explosion | ||
| 70 | 22 | 20 | - | |
| EXP | Speed | |||
| Calm | Disturbed | Enraged | ||
| 75 | 1 | 2.5 | 5 | |
| Density | Zones | |||
| 1.071 EXP/HP | G / Y / O / R / DR | |||
The female counterpart of the Irradiated Male Zombie. Slightly weaker and visibly smaller in size, but also slightly faster. | ||||
|
Notes:
| ||||
|
Tactics/Strategies:
| ||||
| Burned Male Zombie | ||||
 |
HP | Damage | ||
| Melee | Vomit | Explosion | ||
| 80 | 24 | - | - | |
| EXP | Speed | |||
| Calm | Disturbed | Enraged | ||
| 82.5 | 1 | 2.5 | 5 | |
| Density | Zones | |||
| 1.031 EXP/HP | G / Y / O / R / DR | |||
| ||||
|
Notes:
| ||||
|
Tactics/Strategies:
| ||||
| Irradiated Male Zombie | ||||
 |
HP | Damage | ||
| Melee | Vomit | Explosion | ||
| 80 | 24 | 20 | - | |
| EXP | Speed | |||
| Calm | Disturbed | Enraged | ||
| 82.5 | 1 | 2.5 | 5 | |
| Density | Zones | |||
| 1.031 EXP/HP | G / Y / O / R / DR | |||
| ||||
|
Notes:
| ||||
|
Tactics/Strategies:
| ||||
| Blood Hound | ||||
 |
HP | Damage | ||
| Melee | Vomit | Explosion | ||
| 100 | 50 | - | - | |
| EXP | Speed | |||
| Calm | Disturbed | Enraged | ||
| 150 | 2.5 | 5 | 8 | |
| Density | Zones | |||
| 1.5 EXP/HP | Y / O / R / DR | |||
| ||||
|
Notes:
| ||||
|
Tactics/Strategies:
| ||||
Tier 3 - Red Zombies[]
These zombies are even more powerful than the Burned Zombies, and start to appear from the Red zone. They gradually disappears in later parts of the Black zone.
| Red Long Arm | ||||
|---|---|---|---|---|
 |
HP | Damage | ||
| Melee | Vomit | Explosion | ||
| 140 | 40 | - | - | |
| EXP | Speed | |||
| Calm | Disturbed | Enraged | ||
| 187.5 | 1.2 | 2.5 | 4.4 | |
| Density | Zones | |||
| 1.339 EXP/HP | R / DR / Early-BL | |||
| ||||
|
Notes:
| ||||
|
Tactics/Strategies:
| ||||
| Red Rumbler | ||||
 |
HP | Damage | ||
| Melee | Vomit | Explosion | ||
| 170 | 50 | - | - | |
| EXP | Speed | |||
| Calm | Disturbed | Enraged | ||
| 210 | 1 | 2 | 4 | |
| Density | Zones | |||
| 1.235 EXP/HP | R / DR / Early-BL | |||
| ||||
|
Notes:
| ||||
|
Tactics/Strategies:
| ||||
Tier 4 - Black Zombies[]
These are the second most powerful forms of Normal Zombies available in the game. They can only be encountered in the Black and White zone.
| Black Long Arm | ||||
|---|---|---|---|---|
 |
HP | Damage | ||
| Melee | Vomit | Explosion | ||
| 200 | 75 | - | - | |
| EXP | Speed | |||
| Calm | Disturbed | Enraged | ||
| 262.5 | 1.4 | 2.7 | 5.7 | |
| Density | Zones | |||
| 1.313 EXP/HP | BL / W | |||
| ||||
|
Notes:
| ||||
|
Tactics/Strategies:
| ||||
| Irradiated Black Long Arm | ||||
 |
HP | Damage | ||
| Melee | Vomit | Explosion | ||
| 200 | 75 | 60 | - | |
| EXP | Speed | |||
| Calm | Disturbed | Enraged | ||
| 300 | 1.4 | 2.7 | 5.7 | |
| Density | Zones | |||
| 1.5 EXP/HP | BL / W | |||
| ||||
|
Notes:
| ||||
|
Tactics/Strategies:
| ||||
| Flesh Hound | ||||
 |
HP | Damage | ||
| Melee | Vomit | Explosion | ||
| 200 | 100 | - | - | |
| EXP | Speed | |||
| Calm | Disturbed | Enraged | ||
| 300 | 3 | 6 | 11 | |
| Density | Zones | |||
| 1.5 EXP/HP | BL / W | |||
| ||||
|
Notes:
| ||||
|
Tactics/Strategies:
| ||||
| Black Rumbler | ||||
 |
HP | Damage | ||
| Melee | Vomit | Explosion | ||
| 250 | 70 | - | - | |
| EXP | Speed | |||
| Calm | Disturbed | Enraged | ||
| 285 | 1.2 | 2.2 | 4.2 | |
| Density | Zones | |||
| 1.14 EXP/HP | BL / W | |||
| ||||
|
Notes:
| ||||
|
Tactics/Strategies:
| ||||
| Irradiated Black Rumbler | ||||
 |
HP | Damage | ||
| Melee | Vomit | Explosion | ||
| 250 | 70 | - | 60 | |
| EXP | Speed | |||
| Calm | Disturbed | Enraged | ||
| 285 | 1.2 | 2.2 | 4.2 | |
| Density | Zones | |||
| 1.14 EXP/HP | BL / W | |||
| ||||
|
Notes:
| ||||
|
Tactics/Strategies:
| ||||
Tier 5 - Evolved Zombies[]
These zombies replaced the Black Zombies as the most powerful Normal Zombie variants in the game. They can only be encountered in the furthest reach of the South Eastern Zone, also known as the Death Row.
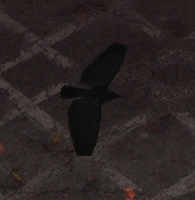
| Crow | ||||
|---|---|---|---|---|
 |
HP | Damage | ||
| Melee | Vomit | Explosion | ||
| 150 | 100 | - | - | |
| EXP | Speed | |||
| Calm | Disturbed | Enraged | ||
| 75 | 7 | 7 | 10 | |
| Density | Zones | |||
| 0.5 EXP/HP | SEZ | |||
This variant found in the gloomy skies of the southeastern border has become quite aggressive, although it is unknown if is the avian strain of the N4 combined with the red mist variant or just hunger that caused this change. The truth is that the crows knew how to adapt to the bleak conditions present in the southern areas and now they persecute any fool who dares to venture into these new areas and their presents dangers, mainly wishing to feast on their eyes and brains. | ||||
|
Notes:
| ||||
|
Tactics/Strategies:
| ||||
| Evolved Long Arm | ||||
 |
HP | Damage | ||
| Melee | Vomit | Explosion | ||
| 500 | 250 | - | - | |
| EXP | Speed | |||
| Calm | Disturbed | Enraged | ||
| 540 | 3 | 13 | 13 | |
| Density | Zones | |||
| 1.08 EXP/HP | SEZ | |||
| ||||
|
Notes:
| ||||
|
Tactics/Strategies:
| ||||
| Armored Evolved Long Arm | ||||
 |
HP | Damage | ||
| Melee | Vomit | Explosion | ||
| 600 + 800 Shield |
300 | - | - | |
| EXP | Speed | |||
| Calm | Disturbed | Enraged | ||
| 660 | 3 | 13 | 13 | |
| Density | Zones | |||
| 1.1 EXP/HP | SEZ | |||
| ||||
|
Notes:
| ||||
|
Tactics/Strategies:
| ||||
| Evolved Rumbler | ||||
 |
HP | Damage | ||
| Melee | Vomit | Explosion | ||
| 600 | 250 | 150 | - | |
| EXP | Speed | |||
| Calm | Disturbed | Enraged | ||
| 600 | 3 | 6 | 6 | |
| Density | Zones | |||
| 1 EXP/HP | SEZ | |||
| ||||
|
Notes:
| ||||
|
Tactics/Strategies:
| ||||
| Cystic Evolved Rumbler | ||||
 |
HP | Damage | ||
| Melee | Vomit | Explosion | ||
| 700 | 300 | 200 | 200 | |
| EXP | Speed | |||
| Calm | Disturbed | Enraged | ||
| 720 | 3 | 6 | 6 | |
| Density | Zones | |||
| 1.029 EXP/HP | SEZ | |||
| ||||
|
Notes:
| ||||
|
Tactics/Strategies:
| ||||
| Canary | ||||
 |
HP | Damage | ||
| Melee | Vomit | Explosion | ||
| 250 | 150 | - | - | |
| EXP | Speed | |||
| Calm | Disturbed | Enraged | ||
| 300 | 3 | 6 | 6 | |
| Density | Zones | |||
| 1.2 EXP/HP | SEZ / WL | |||
| ||||
|
Notes:
| ||||
|
Tactics/Strategies:
| ||||
Raven Ridge Forest Zombies[]
They can only be encountered in the Forest biome of Raven Ridge.
| Hiker Zombie | ||||
|---|---|---|---|---|
| HP | Damage | |||
| Melee | Vomit | Explosion | ||
| 700 | 250 | - | - | |
| EXP | Speed | |||
| Calm | Disturbed | Enraged | ||
| 1,260 | 1.5 | 6 | 13 | |
| Density | Zones | |||
| 1.8 EXP/HP | RR | |||
| ||||
|
Notes:
| ||||
|
Tactics/Strategies:
| ||||
| Wolfhound | ||||
| HP | Damage | |||
| Melee | Vomit | Explosion | ||
| 500 | 250 | - | - | |
| EXP | Speed | |||
| Calm | Disturbed | Enraged | ||
| 720 | 8 | 8 | 16.5 | |
| Density | Zones | |||
| 1.44 EXP/HP | RR | |||
| ||||
|
Notes:
| ||||
|
Tactics/Strategies:
| ||||
| Mirestag | ||||
| HP | Damage | |||
| Melee | Vomit | Explosion | ||
| 600 | 250 | - | - | |
| EXP | Speed | |||
| Calm | Disturbed | Enraged | ||
| 1,080 | 1.5 | 7.5 | 13 | |
| Density | Zones | |||
| 1.8 EXP/HP | RR | |||
| ||||
|
Notes:
| ||||
|
Tactics/Strategies:
| ||||
| Zombear | ||||
| HP | Damage | |||
| Melee | Vomit | Explosion | ||
| 5,000 | 400 | - | - | |
| EXP | Speed | |||
| Calm | Disturbed | Enraged | ||
| 9,000 | 1.5 | 5.5 | 14 | |
| Density | Zones | |||
| 1.8 EXP/HP | RR | |||
| ||||
|
Notes:
| ||||
|
Tactics/Strategies:
| ||||
| Choker | ||||
| HP | Damage | |||
| Melee | Vomit | Explosion | ||
| 600 | 150 | - | - | |
| EXP | Speed | |||
| Calm | Disturbed | Enraged | ||
| 600 | 1.5 | 6 | 12 | |
| Density | Zones | |||
| 1 EXP/HP | RR | |||
| ||||
|
Notes:
| ||||
|
Tactics/Strategies:
| ||||
| Inmate Zombie | ||||
| HP | Damage | |||
| Melee | Vomit | Explosion | ||
| 800 | 350 | - | - | |
| EXP | Speed | |||
| Calm | Disturbed | Enraged | ||
| 1,440 | 1.5 | 6 | 14 | |
| Density | Zones | |||
| 1.8 EXP/HP | RR | |||
| ||||
|
Notes:
| ||||
|
Tactics/Strategies:
| ||||
| Irradiated Inmate Zombie | ||||
| HP | Damage | |||
| Melee | Vomit | Explosion | ||
| 800 | 300 | - | 250 | |
| EXP | Speed | |||
| Calm | Disturbed | Enraged | ||
| 1,440 | 1.5 | 6 | 13 | |
| Density | Zones | |||
| 1.8 EXP/HP | RR | |||
| ||||
|
Notes:
| ||||
|
Tactics/Strategies:
| ||||
| Prison Shieldbearer | ||||
| HP | Damage | |||
| Melee | Vomit | Explosion | ||
| 800 + 2,000 Shield |
250 | - | - | |
| EXP | Speed | |||
| Calm | Disturbed | Enraged | ||
| 1,440 | 1.5 | 6 | 11 | |
| Density | Zones | |||
| 1.8 EXP/HP | RR | |||
| ||||
|
Notes:
| ||||
|
Tactics/Strategies:
| ||||
| Prison Stunlancer | ||||
| HP | Damage | |||
| Melee | Vomit | Explosion | ||
| 800 | 250 | - | - | |
| EXP | Speed | |||
| Calm | Disturbed | Enraged | ||
| 1,440 | 1.5 | 6 | 11 | |
| Density | Zones | |||
| 1.8 EXP/HP | RR | |||
| ||||
|
Notes:
| ||||
|
Tactics/Strategies:
| ||||
Raven Ridge Ashwood Zombies[]
They can only be encountered in the Ashwood biome of Raven Ridge.
| Mega Wolfhound | ||||
|---|---|---|---|---|
| HP | Damage | |||
| Melee | Vomit | Explosion | ||
| 500 | 900 | - | - | |
| EXP | Speed | |||
| Calm | Disturbed | Enraged | ||
| 900 | 8 | 8 | 16.5 | |
| Density | Zones | |||
| 1.8 EXP/HP | RR | |||
| ||||
|
Notes:
| ||||
|
Tactics/Strategies:
| ||||
| Mega Mirestag | ||||
| HP | Damage | |||
| Melee | Vomit | Explosion | ||
| 750 | 250 | - | - | |
| EXP | Speed | |||
| Calm | Disturbed | Enraged | ||
| 1,500 | 1.5 | 8.5 | 13 | |
| Density | Zones | |||
| 2 EXP/HP | RR | |||
| ||||
|
Notes:
| ||||
|
Tactics/Strategies:
| ||||
| Mega Zombear | ||||
| HP | Damage | |||
| Melee | Vomit | Explosion | ||
| 5,000 + 700 Shield |
400 | - | - | |
| EXP | Speed | |||
| Calm | Disturbed | Enraged | ||
| 9,000 | 1.5 | 5.5 | 14 | |
| Density | Zones | |||
| 1.8 EXP/HP | RR | |||
| ||||
|
Notes:
| ||||
|
Tactics/Strategies:
| ||||
| Firefighter Zombie | ||||
| HP | Damage | |||
| Melee | Vomit | Explosion | ||
| 700 | 250 | - | - | |
| EXP | Speed | |||
| Calm | Disturbed | Enraged | ||
| 1,260 | 1.5 | 6 | 12 | |
| Density | Zones | |||
| 1.8 EXP/HP | RR | |||
| ||||
|
Notes:
| ||||
|
Tactics/Strategies:
| ||||
| Elite Military Zombie | ||||
| HP | Damage | |||
| Melee | Vomit | Explosion | ||
| 700 | 250 | - | - | |
| EXP | Speed | |||
| Calm | Disturbed | Enraged | ||
| 1,260 | 1.5 | 6 | 12 | |
| Density | Zones | |||
| 1.8 EXP/HP | RR | |||
| ||||
|
Notes:
| ||||
|
Tactics/Strategies:
| ||||
| Armoured Elite Military Zombie | ||||
| HP | Damage | |||
| Melee | Vomit | Explosion | ||
| 700 + 1,000 Shield |
250 | - | - | |
| EXP | Speed | |||
| Calm | Disturbed | Enraged | ||
| 1,260 | 1.5 | 8 | 12 | |
| Density | Zones | |||
| 1.8 EXP/HP | RR | |||
| ||||
|
Notes:
| ||||
|
Tactics/Strategies:
| ||||
Raven Ridge Toxic Zombies[]
They can only be encountered in the Toxic biome of Raven Ridge.
| Chemical Worker Zombie | ||||
|---|---|---|---|---|
| HP | Damage | |||
| Melee | Vomit | Explosion | ||
| 700 | 250 | - | - | |
| EXP | Speed | |||
| Calm | Disturbed | Enraged | ||
| 1,260 | 1.5 | 5.0 | 12.0 | |
| Density | Zones | |||
| 1.8 EXP/HP | RR | |||
| ||||
|
Notes:
| ||||
|
Tactics/Strategies:
| ||||
| Irradiated Hazmat Zombie | ||||
| HP | Damage | |||
| Melee | Vomit | Explosion | ||
| 700 | 200 | - | 250 | |
| EXP | Speed | |||
| Calm | Disturbed | Enraged | ||
| 1,260 | 1.5 | 5.0 | 12.0 | |
| Density | Zones | |||
| 1.8 EXP/HP | RR | |||
| ||||
|
Notes:
| ||||
|
Tactics/Strategies:
| ||||
| Elite Irradiated Hazmat Zombie | ||||
| HP | Damage | |||
| Melee | Vomit | Explosion | ||
| 900 | 220 | - | 250 | |
| EXP | Speed | |||
| Calm | Disturbed | Enraged | ||
| 1,620 | 1.5 | 8.0 | 13.0 | |
| Density | Zones | |||
| 1.8 EXP/HP | RR | |||
| ||||
|
Notes:
| ||||
|
Tactics/Strategies:
| ||||
| Mutant Rat | ||||
| HP | Damage | |||
| Melee | Vomit | Explosion | ||
| 400 | 150 | - | 250 | |
| EXP | Speed | |||
| Calm | Disturbed | Enraged | ||
| 800 | 2.0 | 12.5 | 15.0 | |
| Density | Zones | |||
| 2 EXP/HP | RR | |||
| ||||
|
Notes:
| ||||
|
Tactics/Strategies:
| ||||
| Toxic Wolfhound | ||||
| HP | Damage | |||
| Melee | Vomit | Explosion | ||
| 500 | 300 | - | - | |
| EXP | Speed | |||
| Calm | Disturbed | Enraged | ||
| 900 | 8 | 8 | 16.5 | |
| Density | Zones | |||
| 1.8 EXP/HP | RR | |||
| ||||
|
Notes:
| ||||
|
Tactics/Strategies: <br | ||||
| Toxic Mirestag | ||||
| HP | Damage | |||
| Melee | Vomit | Explosion | ||
| 750 | 250 | - | - | |
| EXP | Speed | |||
| Calm | Disturbed | Enraged | ||
| 1,500 | 1.5 | 8.5 | 13 | |
| Density | Zones | |||
| 2 EXP/HP | RR | |||
| ||||
|
Notes:
| ||||
|
Tactics/Strategies:
| ||||
| Toxic Zombear | ||||
| HP | Damage | |||
| Melee | Vomit | Explosion | ||
| 5,000 + 700 Shield |
400 | - | - | |
| EXP | Speed | |||
| Calm | Disturbed | Enraged | ||
| 9,000 | 1.5 | 5.5 | 14 | |
| Density | Zones | |||
| 1.8 EXP/HP | RR | |||
| ||||
|
Notes:
| ||||
|
Tactics/Strategies:
| ||||
Raven Ridge Summit Zombies[]
They can only be encountered in the Summit biome of Raven Ridge.
| Snow Wolfhound | ||||
|---|---|---|---|---|
| HP | Damage | |||
| Melee | Vomit | Explosion | ||
| 500 | 300 | - | - | |
| EXP | Speed | |||
| Calm | Disturbed | Enraged | ||
| 900 | 8 | 8 | 16.5 | |
| Density | Zones | |||
| 1.8 EXP/HP | RR | |||
| ||||
|
Notes:
| ||||
|
Tactics/Strategies:
| ||||
| Snow Mirestag | ||||
| HP | Damage | |||
| Melee | Vomit | Explosion | ||
| 750 | 250 | - | - | |
| EXP | Speed | |||
| Calm | Disturbed | Enraged | ||
| 1,500 | 1.5 | 8.5 | 13 | |
| Density | Zones | |||
| 2 EXP/HP | RR | |||
| ||||
|
Notes:
| ||||
|
Tactics/Strategies:
| ||||
| Snow Zombear | ||||
| HP | Damage | |||
| Melee | Vomit | Explosion | ||
| 5,000 + 700 Shield |
400 | - | - | |
| EXP | Speed | |||
| Calm | Disturbed | Enraged | ||
| 9,000 | 1.5 | 5.5 | 14 | |
| Density | Zones | |||
| 1.8 EXP/HP | RR | |||
| ||||
|
Notes:
| ||||
|
Tactics/Strategies:
| ||||
Mutant Zombies[]
Due to the versatile nature of the N4 virus, unique mutants can be found deep in the city. These zombies are not as common as the other zombies, and wield additional abilities that make them even more formidable foes.
Yellow Zone Mutants[]
These mutants can only be encountered almost exclusively in the Yellow zone. For the most part, these are just weaker versions of later mutant types, designed to introduce the player to the concept of mutant zombies.
| Bone | ||||
|---|---|---|---|---|
 |
HP | Damage | ||
| Melee | Vomit | Explosion | ||
| 120 | 30 | - | - | |
| EXP | Speed | |||
| Calm | Disturbed | Enraged | ||
| 220 | 1.2 | 2.5 | 5.0 | |
| Density | Zones | |||
| 1.833 EXP/HP | Late-G / Y | |||
| ||||
|
Notes:
| ||||
|
Tactics/Strategies:
| ||||
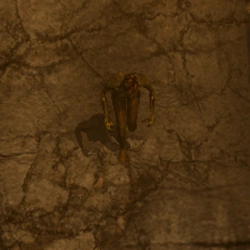
| Reaper | ||||
 |
HP | Damage | ||
| Melee | Vomit | Explosion | ||
| 100 | 35 | - | - | |
| EXP | Speed | |||
| Calm | Disturbed | Enraged | ||
| 160 | 1 | 3.5 | 5 | |
| Density | Zones | |||
| 1.6 EXP/HP | Late-G / Y | |||
| ||||
|
Notes:
| ||||
|
Tactics/Strategies:
| ||||
| Small Bloat | ||||
 |
HP | Damage | ||
| Melee | Vomit | Explosion | ||
| 80 | 20 | - | 10 | |
| EXP | Speed | |||
| Calm | Disturbed | Enraged | ||
| 101.25 | 0.8 | 2.5 | 4.5 | |
| Density | Zones | |||
| 1.266 EXP/HP | Late-G / Y | |||
| ||||
|
Notes:
| ||||
|
Tactics/Strategies:
| ||||
Orange-White Zone Mutants[]
These mutants can be encountered from the Orange to the White zone, except for the Siren which can also be encountered in the Yellow Zone and the Wasteland. As you go deeper into the Inner City, these mutants will be encountered more often.
| Siren | ||||
|---|---|---|---|---|
 |
HP | Damage | ||
| Melee | Vomit | Explosion | ||
| 70 | 0 | - | - | |
| EXP | Speed | |||
| Calm | Disturbed | Enraged | ||
| 150 | 0.8 | 3.0 | 3.0 | |
| Density | Zones | |||
| 2.143 EXP/HP | Y / O / R / DR / BL / W | |||
| ||||
|
Notes:
| ||||
|
Tactics/Strategies:
| ||||
| Bloat | ||||
 |
HP | Damage | ||
| Melee | Vomit | Explosion | ||
| 200 | 40 | - | 40 | |
| EXP | Speed | |||
| Calm | Disturbed | Enraged | ||
| 300 | 1.2 | 3.2 | 4.5 | |
| Density | Zones | |||
| 1.5 EXP/HP | O / R / DR / BL / W | |||
| ||||
|
Notes:
| ||||
|
Tactics/Strategies:
| ||||
| Tendril | ||||
 |
HP | Damage | ||
| Melee | Vomit | Explosion | ||
| 235 | 50 | - | - | |
| EXP | Speed | |||
| Calm | Disturbed | Enraged | ||
| 400 | 1.2 | 3.5 | 6.5 | |
| Density | Zones | |||
| 1.702 EXP/HP | O / R / DR / BL / W | |||
| ||||
|
Notes:
| ||||
|
Tactics/Strategies:
| ||||
| Spider | ||||
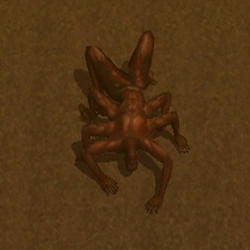 |
HP | Damage | ||
| Melee | Vomit | Explosion | ||
| 300 | 40 | - | - | |
| EXP | Speed | |||
| Calm | Disturbed | Enraged | ||
| 337.5 | 2 | 6.2 | 6.2 | |
| Density | Zones | |||
| 1.125 EXP/HP | O / R / DR / BL / W | |||
| ||||
|
Notes:
| ||||
|
Tactics/Strategies:
| ||||
| Brute | ||||
 |
HP | Damage | ||
| Melee | Vomit | Explosion | ||
| 250 | 30 | 30 | - | |
| EXP | Speed | |||
| Calm | Disturbed | Enraged | ||
| 450 | 1.2 | 3.2 | 5.0 | |
| Density | Zones | |||
| 1.8 EXP/HP | O / R / DR / BL / W | |||
| ||||
|
Notes:
| ||||
|
Tactics/Strategies:
| ||||
| Leaper | ||||
 |
HP | Damage | ||
| Melee | Vomit | Explosion | ||
| 350 | 9,999 | - | - | |
| EXP | Speed | |||
| Calm | Disturbed | Enraged | ||
| 600 | 2.5 | 5.0 | 5.0 | |
| Density | Zones | |||
| 1.714 EXP/HP | O / R / DR / BL / W | |||
| ||||
|
Notes: | ||||
|
Tactics/Strategies: A player wearing a Dawn Reactive with at least 1 Armor and 101 Health remaining is guaranteed to survive a leaper hit. | ||||
Wasteland Mutants[]
These types of zombies alongside the Titan form the population of the Wasteland, replacing all other types of zombies in existence. They are extremely buffed versions of previous mutant types, possessing incredible endurance and powerful attacks; extreme caution should be exercised when dealing with these mutants.
| Black Bone | ||||
|---|---|---|---|---|
 |
HP | Damage | ||
| Melee | Vomit | Explosion | ||
| 600 | 180 | - | 200 | |
| EXP | Speed | |||
| Calm | Disturbed | Enraged | ||
| 1,125 | 1.5 | 3.5 | 9 | |
| Density | Zones | |||
| 1.875 EXP/HP | WL | |||
| ||||
|
Notes:
| ||||
|
Tactics/Strategies:
| ||||
| Black Tendril | ||||
 |
HP | Damage | ||
| Melee | Vomit | Explosion | ||
| 300 | 220 | - | - | |
| EXP | Speed | |||
| Calm | Disturbed | Enraged | ||
| 562.5 | 1.5 | 4.5 | 9 | |
| Density | Zones | |||
| 1.875 EXP/HP | WL | |||
| ||||
|
Notes:
- 35% Fire Damage Resistance | ||||
|
Tactics/Strategies:
| ||||
| Hell Hound | ||||
 |
HP | Damage | ||
| Melee | Vomit | Explosion | ||
| 500 | 250 | - | - | |
| EXP | Speed | |||
| Calm | Disturbed | Enraged | ||
| 937.5 | 3 | 6 | 11 | |
| Density | Zones | |||
| 1.875 EXP/HP | WL | |||
| ||||
|
Notes:
| ||||
|
Tactics/Strategies:
| ||||
| Harvester | ||||
 |
HP | Damage | ||
| Melee | Vomit | Explosion | ||
| 550 | 9,999 | - | - | |
| EXP | Speed | |||
| Calm | Disturbed | Enraged | ||
| 1,031.25 | 1.5 | 3.5 | 7 | |
| Density | Zones | |||
| 1.875 EXP/HP | WL | |||
A more deadly cousin of the Reaper, their scythes have evolved to the point where they can break through even the strongest of armors. | ||||
|
Notes:
| ||||
|
Tactics/Strategies:
| ||||
Retired[]
| Shieldbearer | ||||
|---|---|---|---|---|
 |
HP | Damage | ||
| Melee | Vomit | Explosion | ||
| 300 | 200 | - | - | |
| EXP | Speed | |||
| Calm | Disturbed | Enraged | ||
| 562.5 | 1.5 | 3.5 | 8 | |
| Density | Zones | |||
| 1.875 EXP/HP | WL | |||
| ||||
|
Notes:
| ||||
|
Tactics/Strategies:
| ||||
Bosses[]
Bosses were moved to a separate page so more information could be added about them. You can find them here: https://deadfrontier.fandom.com/wiki/Bosses
2D Beta Era[]
These zombies were available in "Dead Frontier Classic", the original version of Dead Frontier which was fully 2D and based on Adobe flash before the change to Unity3D for better overall performance, more freedom, usage of 3D game content and other advantages. In 2D, you always viewed the game from a Bird's Eye point of view.
| 2D Beta Era Zombies | ||||||||||||||||||||||||||||||||||||||||||||||||||||||||||||||||||||||||
|---|---|---|---|---|---|---|---|---|---|---|---|---|---|---|---|---|---|---|---|---|---|---|---|---|---|---|---|---|---|---|---|---|---|---|---|---|---|---|---|---|---|---|---|---|---|---|---|---|---|---|---|---|---|---|---|---|---|---|---|---|---|---|---|---|---|---|---|---|---|---|---|---|
|
Tier I - Gray Zombies (Infected)
Tier II - Purple Zombies (Burnt/Charred Zombies) & Crows Yet a good lot of zombies survived this, only their clothes, human skin and the ropes turned to ashes, while the highly regenerative N4 virus generated a new skin right above the zombies' muscles. At first this skin was blue, then soon it turned purple and stayed that way. Due to these mutations and their history, these zombies are also referred to as "Charred Zombies". These are the zombies from which you loot Charred/Crow blood Samples for Research missions.
Tier III - Red Zombies (Mutated Zombies)
Tier IV - Green Zombies (Irradiated Zombies) (Note: With the release of missions, some insight was given on green zombies. Green zombies are referred to as "irradiated" - players may be tasked with looting "Irradiated" Blood Samples from green zombies.)
Tier V - The Behemoth
| ||||||||||||||||||||||||||||||||||||||||||||||||||||||||||||||||||||||||


Old Zombies[]
These zombies appeared in the earlier stages of the infection, but vanished from the city after several weeks.
| Old Zombies | ||||||||||||
|---|---|---|---|---|---|---|---|---|---|---|---|---|
|
Blue Zombies
Red Zombies
|


